F-15C - Making the Right Glareshield
You'd think that heat forming acrylic would be a great big pain in the butt,
wouldn't you? That isn't necessarily so.
Rob and I had been scratching our heads on how to build a good replica
of a glareshield half we'd never seen. I had gotten my hands on the left
hand half a couple of months ago, so we knew how long it had to be.
Eventually, Rob started working on a 1/8" MDF replica of it. This turned
out ok, but wasn't exactly what was needed.
This last Saturday, we started working on it again after a long hiatus.
Rob built another template to use and we set it into position over the
right instrument panel half. We wanted to use a 1/8" sheet of Lexan to
create the new glareshield half. After trying a couple of different methods
including a pair of 1000 Watt lamps, we got stumped as to what we could use
to form the plastic.
After wandering around the shop a bit, I said to Rob: "Look, the only thing
I have left that would generate a lot of heat is the propane space heater".
I'll be a son of a bitch. Necessity IS the mother of invention! Hehe.
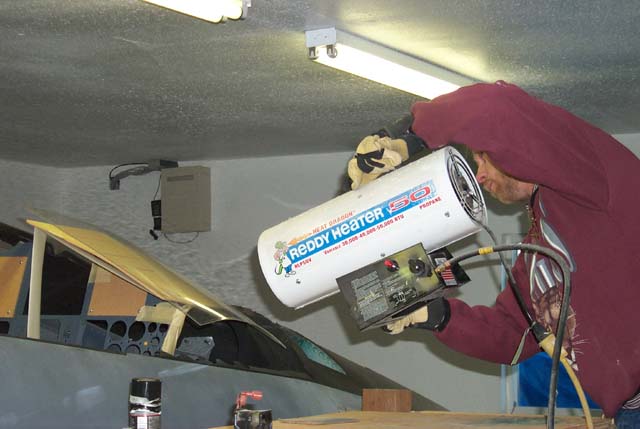
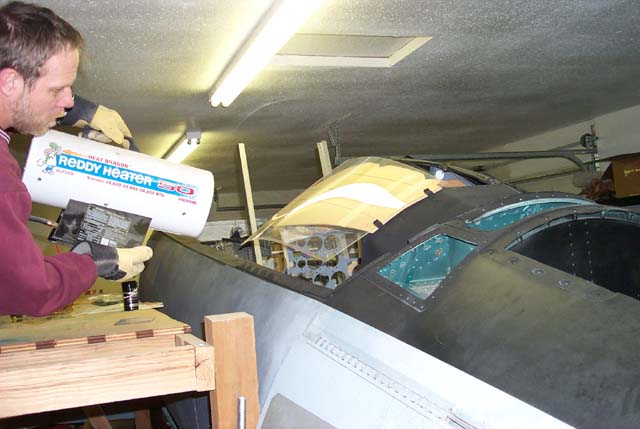 Yes, he's doing exactly what you think he is. A propate space heater IS
a hand-held tool when the need arises! (Don't try this at home kids, we're
Professionals of Mechanical Improvisation)
It looks pretty crazy alright. As Rob heated the plastic I (wearing gloves)
formed the plastic around the makeshift mold by hand. Eventually I used a
short plywood "stick" to keep from getting burned any more than I already was.
(Ok, not exactly burned, but "well heated" to say the least.)
Below is the result:
Yes, he's doing exactly what you think he is. A propate space heater IS
a hand-held tool when the need arises! (Don't try this at home kids, we're
Professionals of Mechanical Improvisation)
It looks pretty crazy alright. As Rob heated the plastic I (wearing gloves)
formed the plastic around the makeshift mold by hand. Eventually I used a
short plywood "stick" to keep from getting burned any more than I already was.
(Ok, not exactly burned, but "well heated" to say the least.)
Below is the result:
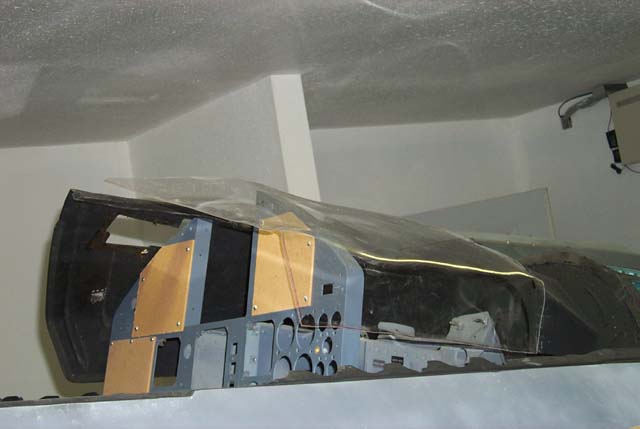
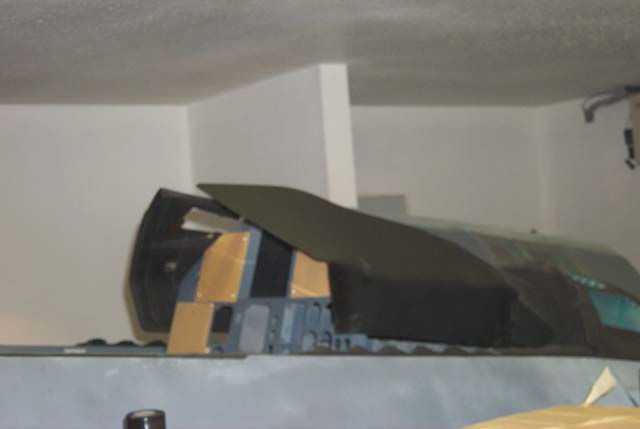
 The result was pretty impressive considering the methods we used to get to this
point.
Here is what it looks like painted up and and re-installed:
The result was pretty impressive considering the methods we used to get to this
point.
Here is what it looks like painted up and and re-installed:
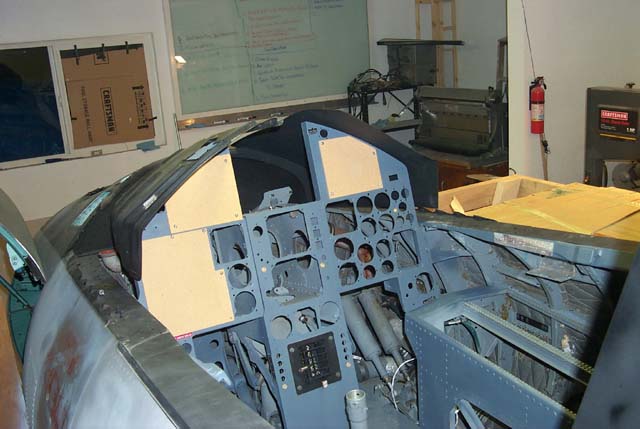
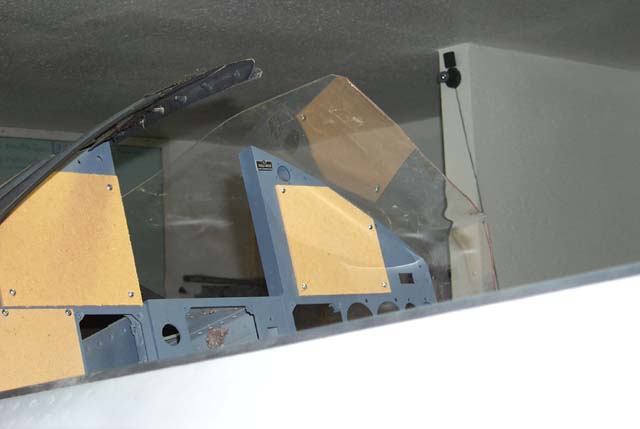
 There is still some finish work to be done, such as adding the rubber coaming
to the leading edge of the glareshield half and making hold-down brackets so
it will grip the instrument panel. All in all, I'm impressed with the result!
There is still some finish work to be done, such as adding the rubber coaming
to the leading edge of the glareshield half and making hold-down brackets so
it will grip the instrument panel. All in all, I'm impressed with the result!