Updated May 21st, 2002
Well it's now getting to where we need to start getting things moving again.
Construction on the new canopy began a few weeks ago and it's turning out
VERY well!
 Due to the height restrictions that we have to work with, it was decided that
a sliding canopy would provide us with the best method of closing up the
cockpit.
Due to the height restrictions that we have to work with, it was decided that
a sliding canopy would provide us with the best method of closing up the
cockpit.
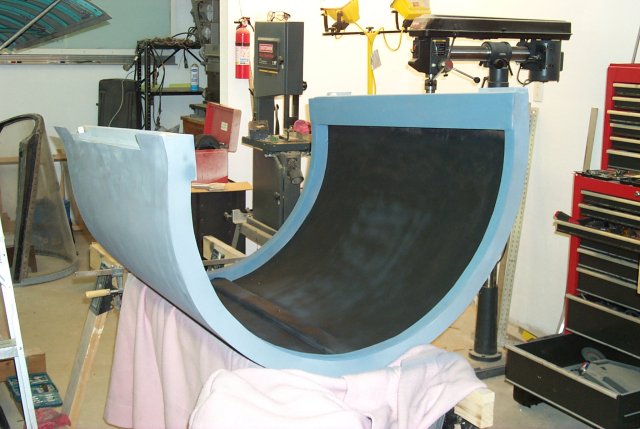
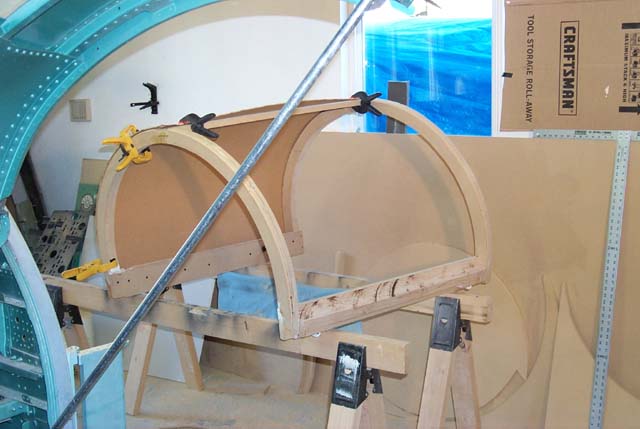
 The canopy frame itself is built entirely out of 3/4" and 1/2" MDF (Medium
Density Fiberboard). The bows in the front and rear are made of two 3/4"
thick pieces that were laminated together and later sanded to final shape.
A RotoZip tool was used to cut the bows.
The front bow is an exact copy of the arc formed by the windscreen. The
rear bow was made by carefully scaling up the first bow by a few percent.
Fortunately we got it right the first time.
The canopy frame itself is built entirely out of 3/4" and 1/2" MDF (Medium
Density Fiberboard). The bows in the front and rear are made of two 3/4"
thick pieces that were laminated together and later sanded to final shape.
A RotoZip tool was used to cut the bows.
The front bow is an exact copy of the arc formed by the windscreen. The
rear bow was made by carefully scaling up the first bow by a few percent.
Fortunately we got it right the first time.
 On each side of the canopy frame, 2x4 stock was cut down and fitted - this
will take the physical weight of the canopy and also provides a sold mounting
point for the small wheels that allows the canopy to slide easily. You can
just make out the bottom of one of the wheels in the far lower left of the
photo.
On each side of the canopy frame, 2x4 stock was cut down and fitted - this
will take the physical weight of the canopy and also provides a sold mounting
point for the small wheels that allows the canopy to slide easily. You can
just make out the bottom of one of the wheels in the far lower left of the
photo.
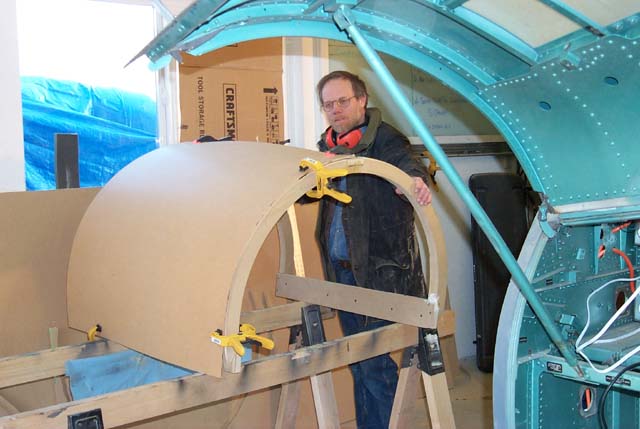
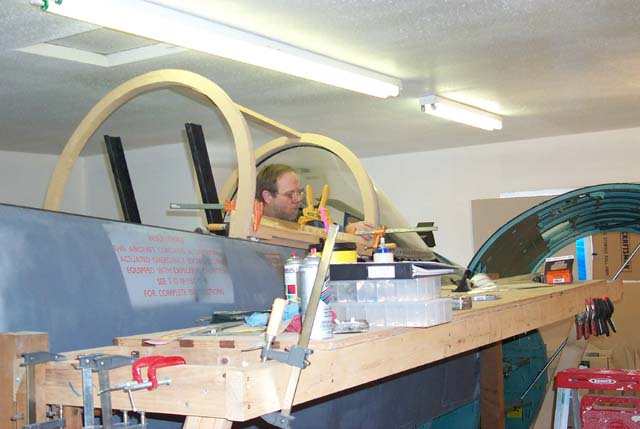 Here's a pic of Rob doing the final clamp set on the right side.
 The left skin is being applied. The canopy is skinned with two sheets of
1/8" MDF. It was decided to do it in two sections to avoid any extreme
stress points on the skin.
The left skin is being applied. The canopy is skinned with two sheets of
1/8" MDF. It was decided to do it in two sections to avoid any extreme
stress points on the skin.
 Rob Sez: "Damn. That's pretty cool."
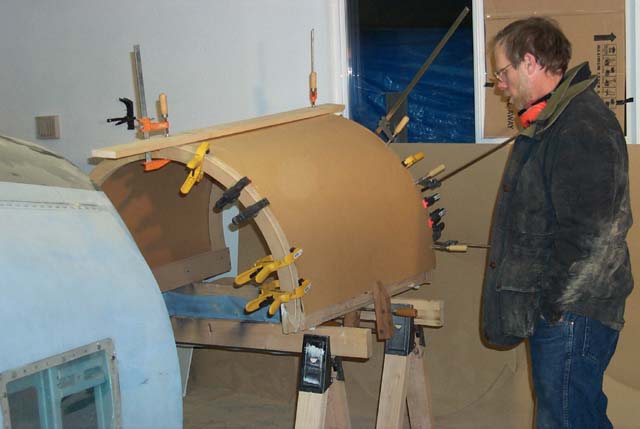 ...and the second skin is in place. Yes, there are *15* clamps involved.
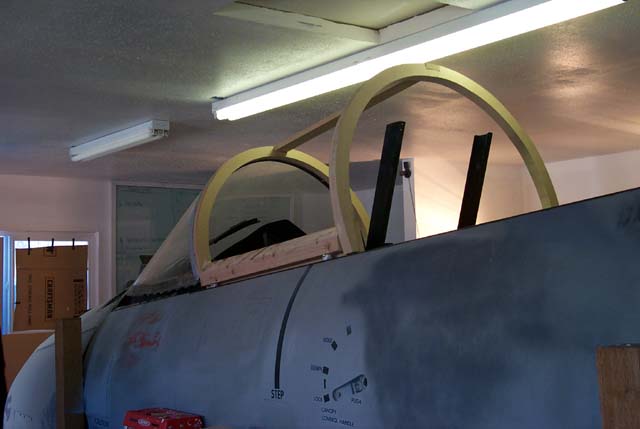
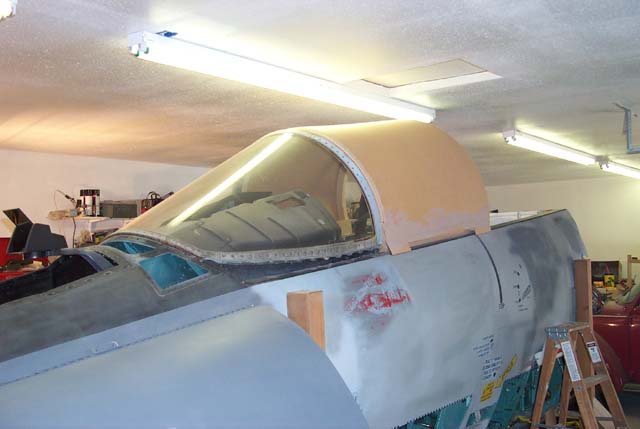 This is how it looks mounted on the fuselage. Work is in progress to give
the canopy a more "shaped" look through the massive application of Bondo.
Don't laugh, the results will blow your mind. :)
This is how it looks mounted on the fuselage. Work is in progress to give
the canopy a more "shaped" look through the massive application of Bondo.
Don't laugh, the results will blow your mind. :)
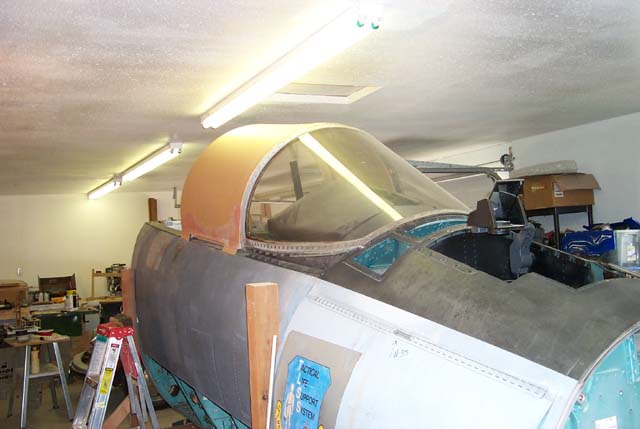 As you can see here, we've removed the construction platform we'd built.
Now that the really difficult interior work has been completed, we didn't
need it any longer. It's absence also makes working on the canopy and
wind screen a LOT easier. That windscreen weighs about 120lbs and can
be quite difficult to manipulate.
As soon as the canopy is completed, "wing" shelves will be installed on
each side to accomodate the 19" CRTs that will provide the side views.
Appropriately sized cutouts for the displays will be made of course.
The interior of the canopy will be painted flat black and the correct
lock/shoot lights will be installed on the inside edge of the forward
canopy bow.
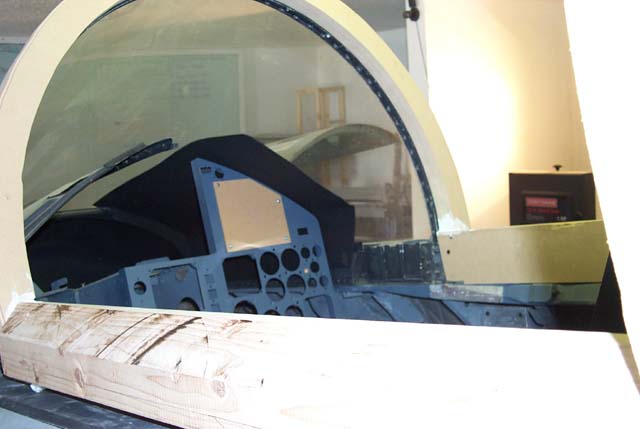
Update! As you can see in the below image, the canopy is pretty much
done. All that remains is the lock/shoot lights, the backup compass
and some generic interior lighting.
As you can see here, we've removed the construction platform we'd built.
Now that the really difficult interior work has been completed, we didn't
need it any longer. It's absence also makes working on the canopy and
wind screen a LOT easier. That windscreen weighs about 120lbs and can
be quite difficult to manipulate.
As soon as the canopy is completed, "wing" shelves will be installed on
each side to accomodate the 19" CRTs that will provide the side views.
Appropriately sized cutouts for the displays will be made of course.
The interior of the canopy will be painted flat black and the correct
lock/shoot lights will be installed on the inside edge of the forward
canopy bow.
Update! As you can see in the below image, the canopy is pretty much
done. All that remains is the lock/shoot lights, the backup compass
and some generic interior lighting.