

After many years of being disconnected, the flight controls are getting worked on!
Now that I’ve got a 3D printer, can I easily make things that would be a costly nightmare to have fabricated by someone else, or done myself in metal.
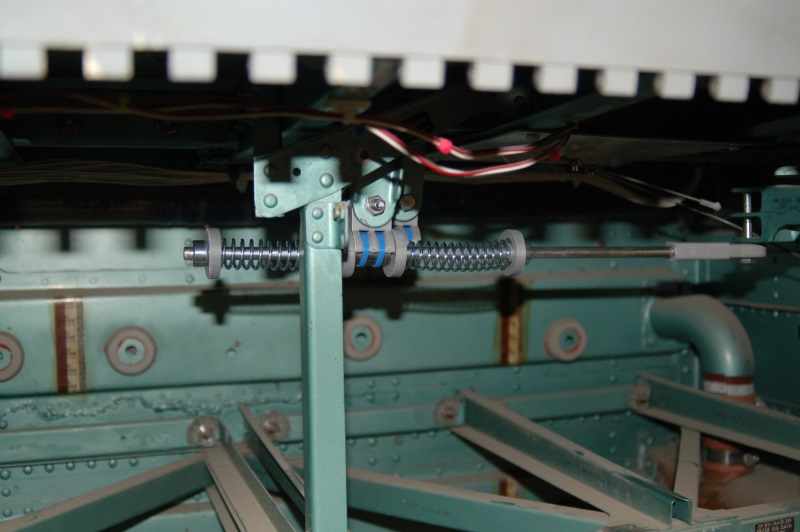
A good way to make a stick centering mechanism is to have a pushrod loaded with springs on either side of a bearing point. This is what I did with the flight controls in my 109F/X cockpit and it works great on the F-15!
Here’s the roll axis connection:
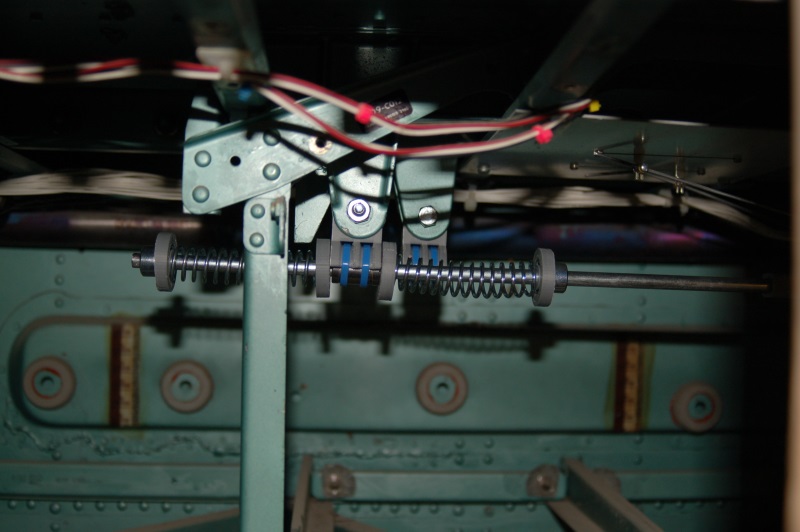
The grey parts in the image were printed on my 3D printer (a Rostock MAX by SeeMeCNC – http://www.seemecnc.com). The center point holds an LM8UU linear bearing. The bearing is held in place using a pair of wire ties. Since the bearing doesn’t receive any twisting or side-force, this is a perfectly adequate method of retaining the bearing in the mount.
The pushrod is a 5/16″ plated rod that makes it about 7.95mm in diameter – a perfect fit for the linear bearing!
The pushrod connects to the roll axis fork using a printed rod end as shown below:
The rod end is printed because I couldn’t find one that would take a 5/16″ rod, but had a 1/4″ hole in the end. The roll axis fork is drilled for a 1/4″ bolt and I didn’t want to increase the size of it.
The grey caps keep the springs centered on the shaft and prevents the springs from coming into contact with the pushrod, resulting in a nice and quiet system.
The springs I used may have to be replaced, they’re _almost_ too stiff. Once the SFS box and grip are installed, I’ll know for sure if I have to go to a lighter spring.
The pitch axis centering will be installed later – I didn’t have the parts ready when I took pics of it on Saturday (3/16/13) – I’d forgotten to print four more end caps for the spring!
The SFS box and its metal top were sanded to final shape and finish on Saturday and the SFS box got a coat of Shellac to seal it in preparation for painting. I also got the hole bored for the SFS cable connector that connects to the bottom of the box. Pics on that next week!

